Be sure to enter the Picky Sticky Giveaway HERE before Friday!
===================================
This sweet little wallet works for your cash or for your little kiddos play money... simple, thin and not too difficult! You need: 2 8x9 rectangles 1 4x8 rectangle 2 3x8 rectangles 1 7in. zipper iron on vinyl (next to the wonder-under in your fabric store) velcro bias tape
Iron on the vinyl to one of your 8x9 rectangles (the outside fabric) as well as the three smaller rectangles.
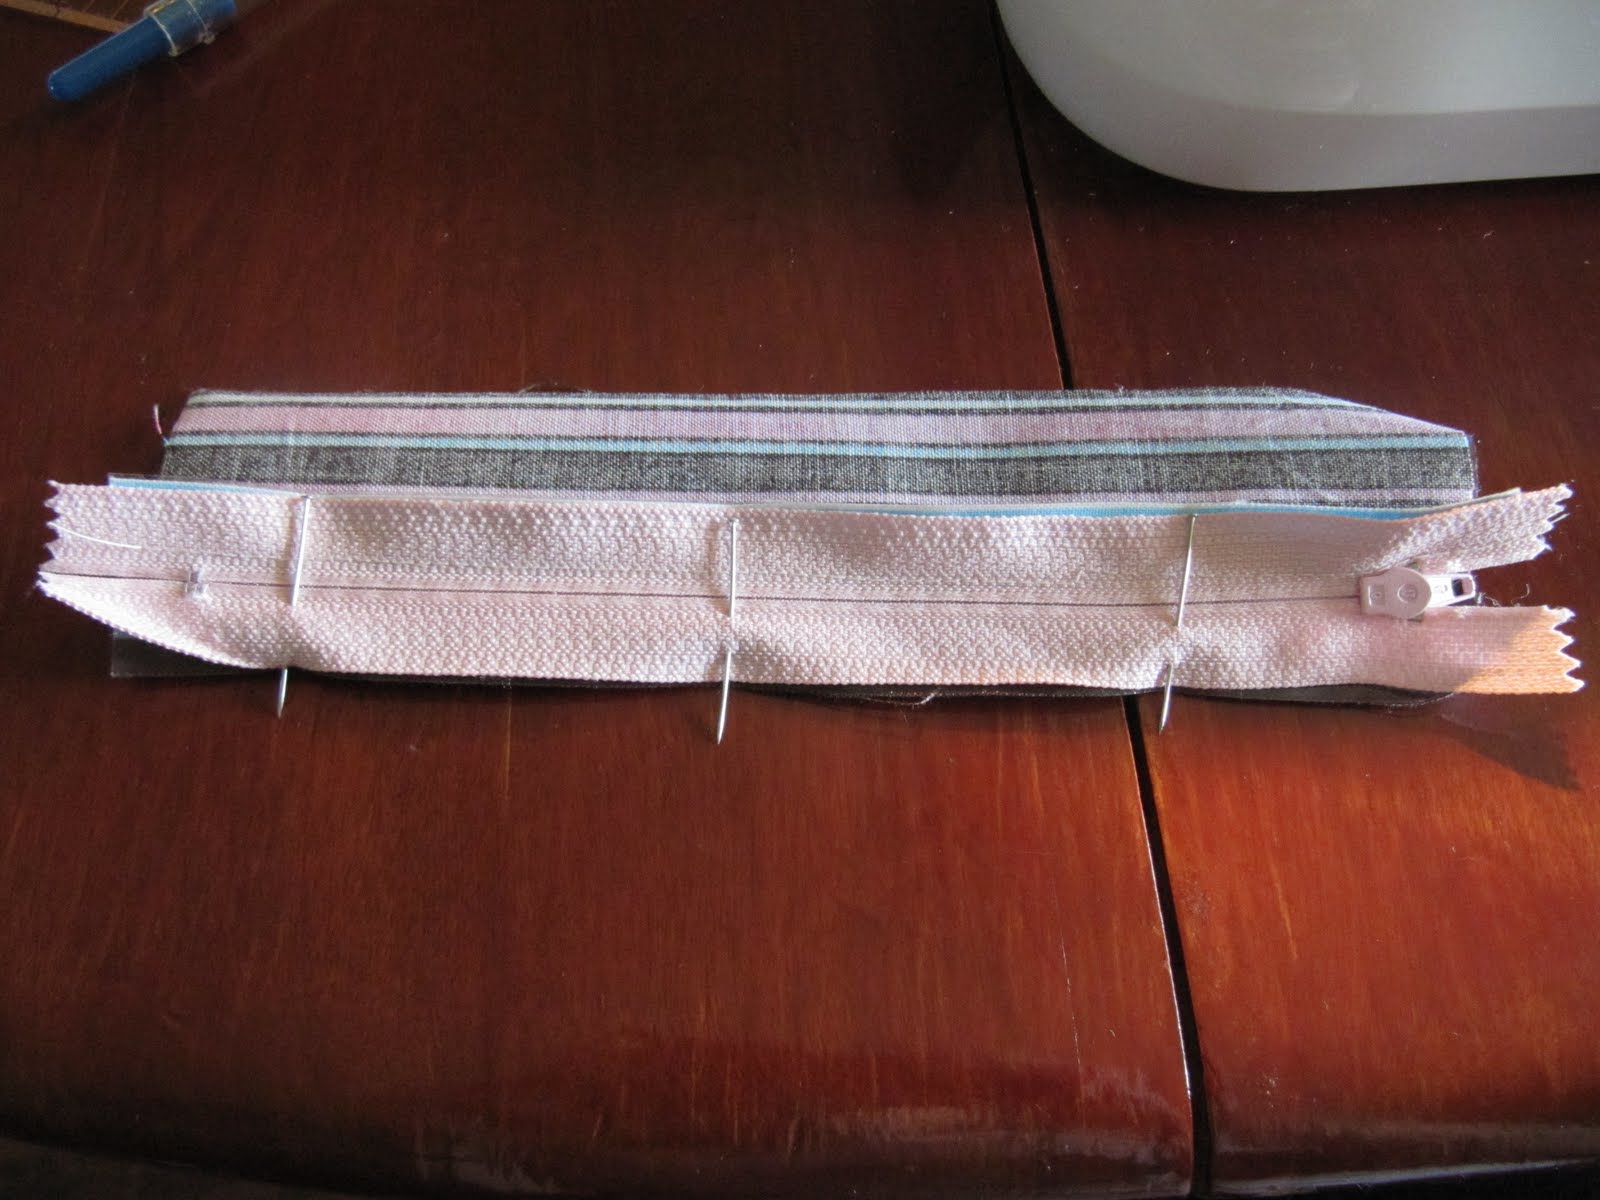
Pin the zipper to one side of the 3x8 fabric with the right side facing in.
Using your zipper foot....
... sew the zipper onto the fabric.
Open out and repeat with the other side of the fabric.
When you open the fabric out, you should have a nicely tucked in zipper!
Top-stitch over the fabric to secure the zipper and create a finished edge... repeat for the other side.
Sew a bit of velcro onto the rectangles... one on the 4x8 and one on the zipper side.
Then sew some bias tape onto the non-velcro side of the 4x8 and velcro pieces of fabric.
Pin the two rectangles to the inside 8x9 fabric. Sew across the bias tape on the zipper side. This should attach the zipper pouch to the inside fabric. Only sew across the zipper pouch, as the other side needs to be an open pocket.
Pin the outside fabric to the top of all the insides. Stitch around the outside, leaving a 4 inch opening.
Trim the corners and turn inside out.
Top stitch around the outside of the whole wallet.
Now you have a sweet little wallet for your cash or your kiddos play cash.
It is the season for picnics and outdoor concerts and afternoons in the sun... which means it is also the season for damp bums after the moisture soaks through your picnic blanket... am I right?!?!?! Well... this handy little outside play blanket puts an end to that embarrassing little conundrum.
You need: light to medium weight vinyl fabric (comes on 54 inch wide rolls) equal size pieces of two fabrics (I used cotton and flannel)
Cut your fabric the same size... I did mine in a 48 inch square to make a small play blanket or to seat one adult and one child. Line up and pin your fabrics, right sides in... like this: fabric #1 (facing in), vinyl, fabric #2 (facing in).
Stitch all the way around the whole blanket leaving a 8-10 inch opening.
Trim the corners.
Push in the corners and turn the blanket right side out so the vinyl is on one side and the flannel (or your top fabric) is on the other side. Your other fabric should be showing right side out through the vinyl.
Fold in the opening and top-stitch all the way around the whole blanket. This takes some patience, as the blanket is heavy and the vinyl tends to stick to the machine as you sew. It helps to have the vinyl side down and then hold the blanket up gently as you sew.
Outside blanket... for waterproof bums!
Look at that little mess... enjoying some beautiful time outside... with a dry bum!
"Mom... I love it out here... and I love my puffs."
In an effort to be "green" a couple years ago, I bought some microfiber cloths on sale. I used them a few times, but I really hated the way they felt on my skin. It was as if they were getting caught on my skin... so I stopped using them and stashed them away. *** I have a serger. I got it for my birthday, and it has been sitting in my closet waiting for me to be inspired to use it. It is kind of terrifying... with the four spools of thread, two needles, and the moving blade. I got it out of the box once, looked at it, got spooked, and promptly returned it to the box. This week I decided it was time to face my fear and tackle the serger. There are plenty of people who use the serger successfully and never lose a finger. *** After some playing around, I decided it was time to complete a project... so I found those old microfiber clothes and some scraps of fabric... stitch around the outside... and wala... I can now dust without feeling like the rag is going to take of my skin!
If you don't have a serger... but have the same icky feeling with microfiber, you can easily add a backing to your cloths as well... just use the same technique as I used to make baby blankets HERE. These would make such great gifts... housewarming anyone?!?
And with the serger... even the scraps look pretty!
I have a friend whose baby boy has just turned 1 year old (if you are reading this, cover your eyes). His mom was with me when I found this great Little People set at a consignment sale for only a few dollars! Upon getting it home, cleaning it a bit and inspecting it further I decided the little workers needed a work area! So I put some scraps, felt and my hot glue gun to great use and created a play mat....
The mat also works with dinosaurs... or could easily be modified to work with other play sets... a water wonderland or an arctic tundra?!?
I started by sketching my design and measuring the length of the play set and the road so my mat would match up with the set. Next I cut some basic shapes out of felt... rocks, a road, shrubs and a tree. I attached velcro (using a zig-zag stitch) to the bottom layer of the shrub.
Then I stitched across all the layers to give it some shape.
Side view of the shrub.
For the tree, I used some scraps, stitched together, flipped inside out, stuffed with an old wipes bag (for stability) and hot glued the greenery to the trunk. I also glued some velcro to the bottom.
I wanted to be able to roll the mat, so I gave it a backing using some old scrap brown fabric and I added a pocket... top stitch around the whole thing to stabilize... and ta-da!!
Rolled up for easy transportation!!!
And now... a certain little one year old (gasp) will have a special area to dig and build with his Little People!
Easter is coming up... check out the awesome giveaways with prizes that would liven up any Easter basket!
Looking for the BooBoo and Norm GIVEAWAY? Check it out HERE until March 11. ----------------------------------------------
Have you entered the Abigail's Hope Designs Giveaway Yet? Check it out HERE until March 18. ----------------------------------------------
Have you ever become overrun by plastic grocery bags? I know we have. I usually take my shopping bags with me, but there there are always the exceptions... and I end up with plastic bags all over. Here are a few ideas of uses for your plastic bags... and a tutorial to create a place to store them!
1. Return them to the grocery store to be recycled. Stores that use plastic bags are supposed to carry a recycle bin for them... so you can take them back and let them be turned into something new.
2. Use them to dispose of dirty diapers... or your doggy's doo while out and about. Store a few in your car or diaper bag so they are always ready.
3. Use them to line your little rubbish bins. And stash a few extra in the bottom of the bin (below the liner) so your next bag is ready at hand.
4. Transporting wet items (summer is coming soon... swimming season)! Hang it inside out to dry and use one or two for the whole summer!
5. Use the bags as packing filler instead of styrofoam or bubble wrap.
-----------------------
And... you need a pretty place to store all those bags... and in under 30 minutes, you can make your own bag holder!!
What you need: Fat Quarter of a material of your choice... I chose to use home decor fabric because it is so sturdy (and I had it on hand)... but cotton would work just as well 16in of elastic (I used 1/2 in.) Safety Pin Thread Scissors Sewing Machine
Cut your pieces. I wanted my bag holder long and skinny so I could store it in my pantry. You can adjust your measurements to get a fatter/shorter holder as you like. My pieces were 12x20in and 12x5in.
Take your smaller piece and fold it in half. Then fold each edge inside so that you have two folds out on one side and one fold out on the other. Top-stitch across this on each edge. This will become your strap.
Fold in the edge 1/4in. going down the side about an inch. Stitch in place. This will give the sleeve (for the elastic) a finished edge. Fold in the top and stitch across leaving a 3/8in. sleeve for your elastic. Repeat on the bottom.
Pin the strap in place on the edge of the top side. Pin it near the edge so your seam will be in the back. Stitch the handle in place. Go over it a couple times to give it some security. You will be tugging bags out from the bottom, so you want the strap to be stable.
Fold the bag holder in half lengthwise. Pin the long edge together (on the raw side) and stitch. Use a safety pin to thread the elastic through the sleeve and pin or clamp the ends together. Do this on both sides of the bag holder.
Sew over the elastic (two layers) a few times so it is super sturdy. Work the elastic back inside the sleeve.
Turn the holder right side out.
Hang your new handy-dandy bag holder and enjoy!
I am linking this to the I Made It! Blog Party HERE!
I am a proud wife and mama! I love being with my family and friends. I spend my free time crafting, trying to live "green," cooking, and saving money. Here, you will find my ramblings on all the things I love!